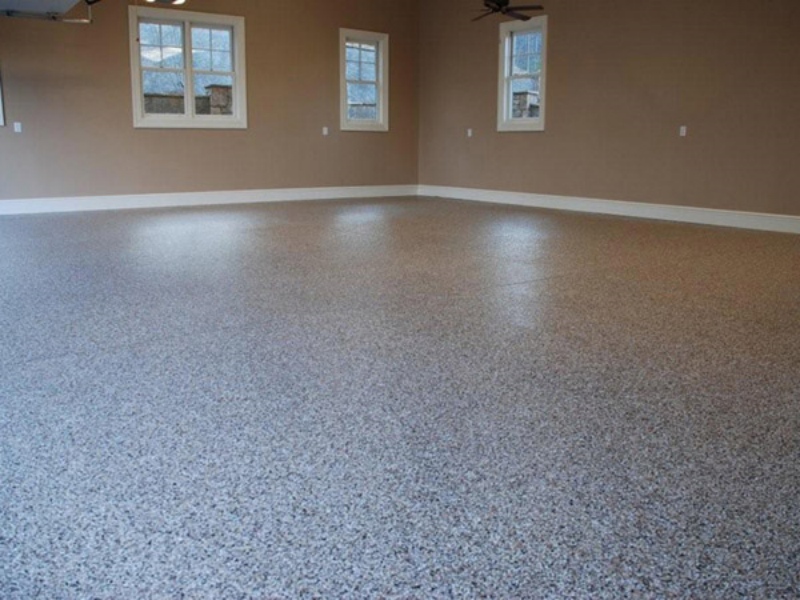
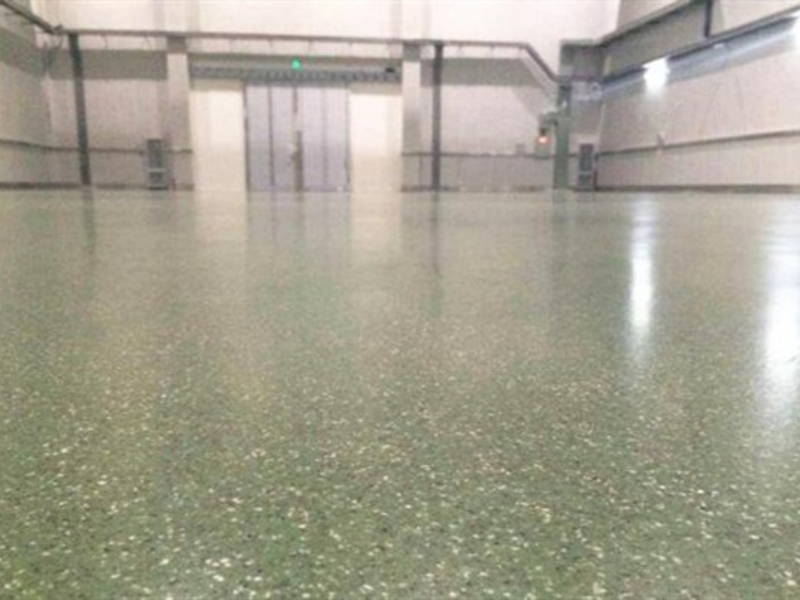
Water-based epoxy self-leveling floor paint

Home

Water-based epoxy self-leveling floor paint

  • Villa Water-Based Epoxy Color Sand Self-Leveling Floor | Luxury Seamless Liquid Marble Flooring
    Villa Water-Based Epoxy Color Sand Self-Leveling Floor | Luxury Seamless Liquid Marble Flooring
    Aug 18, 2026
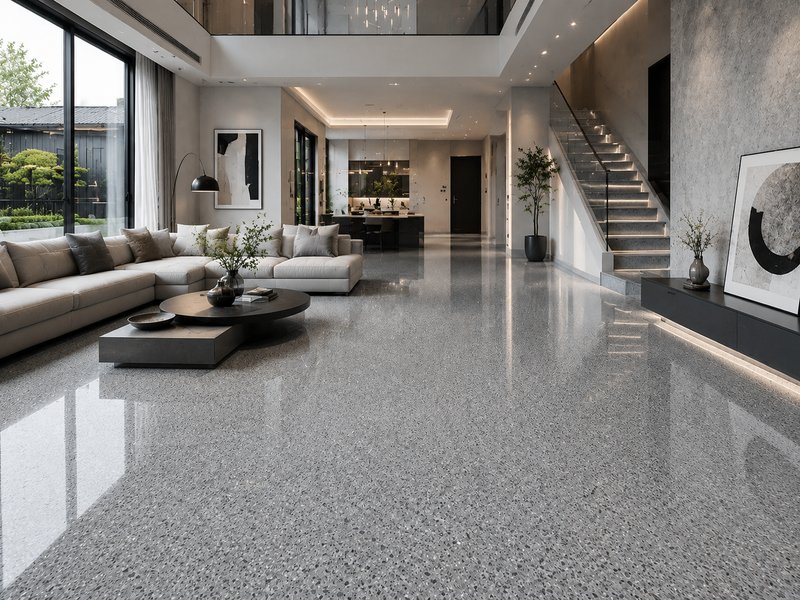
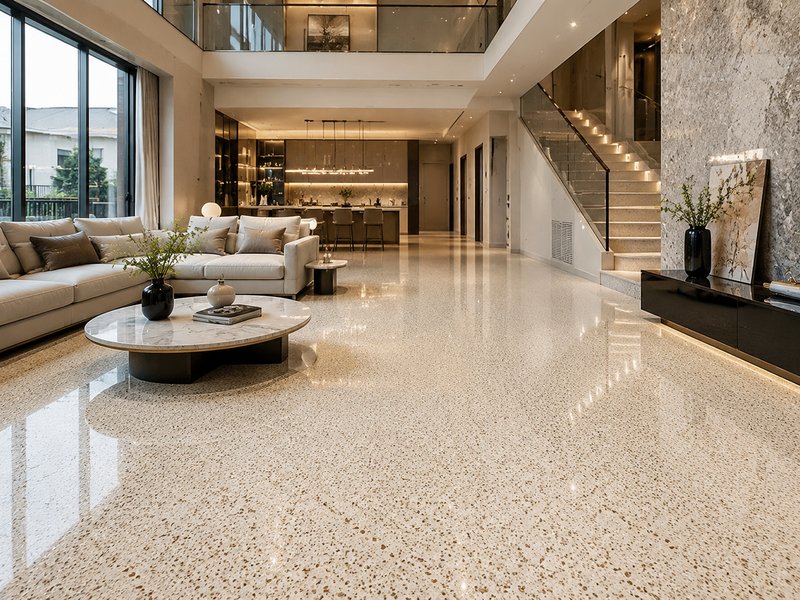
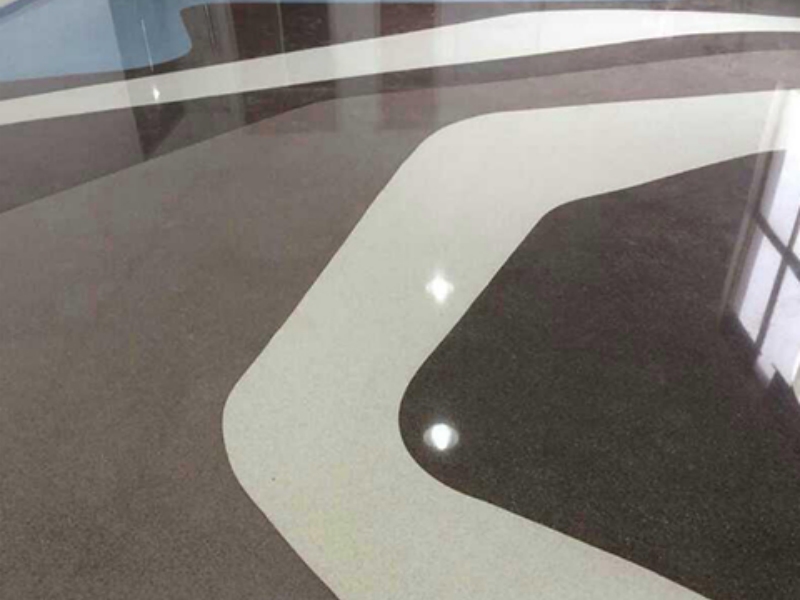
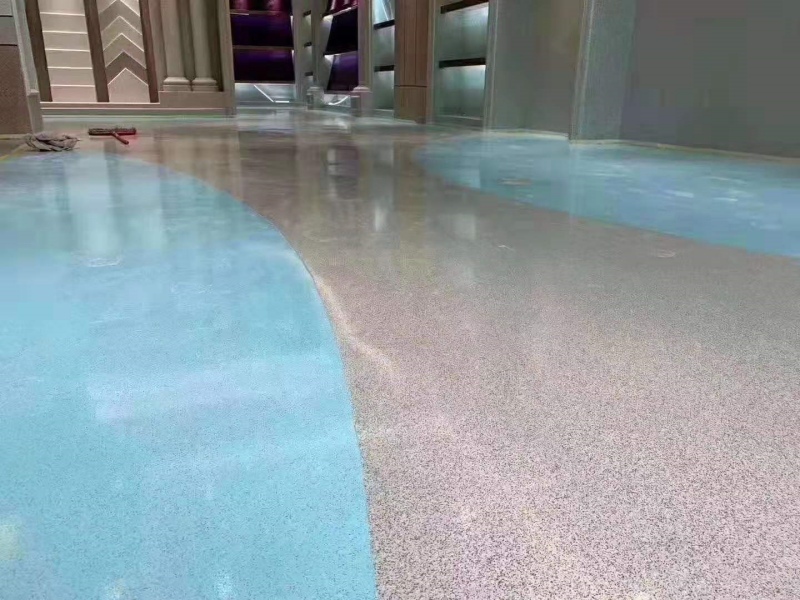
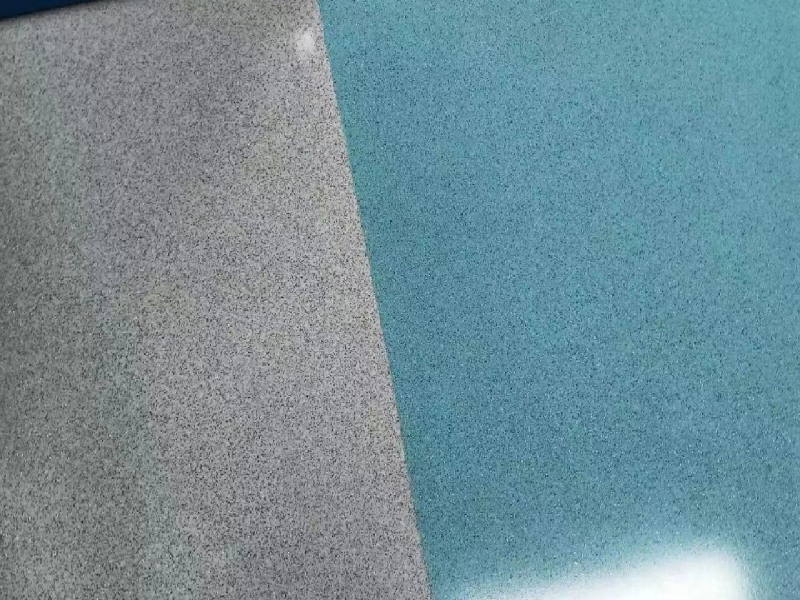
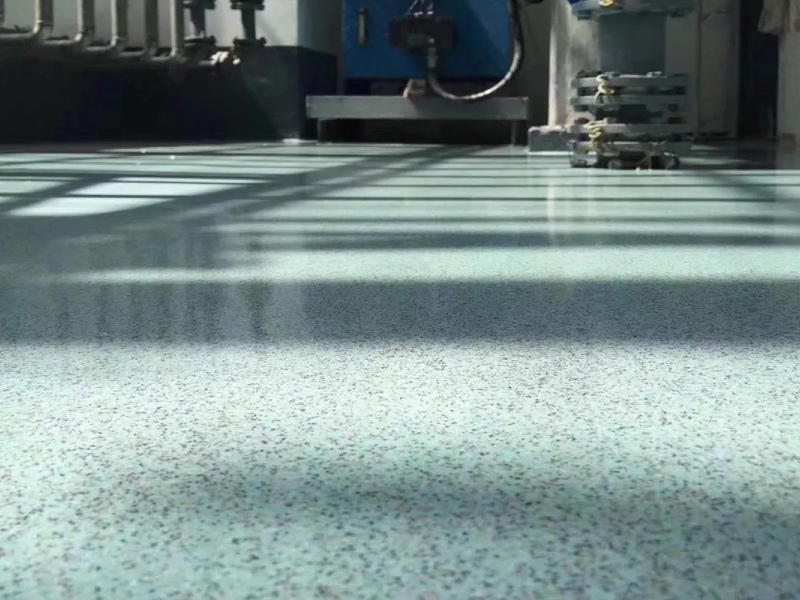
    Luxury villa water-based epoxy color sand self-leveling floor paint provides seamless liquid marble stone effect, eco-friendly, high hardness, scratch-resistant, perfect for modern villa interior flooring, living room, basement and balcony decoration. Modern high-end villa decoration is increasingly pursuing integrated seamless flooring, natural stone texture, healthy environmental protection and easy daily maintenance. Traditional tiles have grout dirt problems, and natural marble is expensive, heavy and difficult to install. Water-based epoxy color sand self-leveling flooring, also widely known as liquid marble flooring or liquid terrazzo flooring, has become the most popular luxury flooring solution for modern villas. It perfectly combines high-end decorative appearance and practical floor performance. What Is Villa Water-Based Epoxy Color Sand Self-Leveling Floor? Different from ordinary thin floor paint, villa-grade water-based epoxy color sand self-leveling system adopts water-based eco-friendly epoxy resin + natural colored quartz sand. After professional self-leveling construction, it forms an integral seamless floor with natural gradient stone texture. The whole floor has no seams, no gaps, no hollowing, presenting a high-grade liquid marble visual effect. It is the best alternative to natural marble and traditional terrazzo for villa interior decoration. Core Advantages for Villa Home Decoration 1. Zero Formaldehyde & Low VOC, Healthy for Family Adopts pure water-based formula, no pungent odor during construction and after curing. It meets high-end residential environmental protection standards, safe for children rooms, bedrooms and long-term family living spaces. 2. Fully Seamless, No Dust & No Dirt Accumulation Tiles have grout lines that easily hide bacteria, mold and dust. The epoxy color sand self-leveling floor is one-piece seamless, completely solving the problem of dirty floor gaps, super easy to clean and maintain. 3. High Hardness & Strong Scratch Resistance (Up to 7H) The cured floor reaches 7H pencil hardness, resisting daily scratches from shoes, furniture movement and small hard objects. It will not leave traces under normal villa home use, maintaining long-term new floor effect. 4. Luxury Liquid Marble & Custom Texture Supports customized color matching, sand particle size and gloss effect (matte / satin / high gloss). It can simulate luxury marble, gradient stone and modern minimalist texture, matching any modern, light luxury, industrial and Nordic villa style. 5. Crack-Resistant & Wear-Resistant, Long Service Life The color sand mortar layer enhances the floor strength greatly. The floor is compression-resistant, wear-resistant and not easy to crack. Compared with ordinary floors, it has longer service life and more stable performance for villa long-term use. 6. Integral Whole-House Floor Solution Can be constructed in one continuous piece for living room, dining room, corridor, basement, indoor balcony and study room, realizing unified whole-house high-end decorative effect. Professional Villa Flooring Construction System We adopt complete villa-grade water-based epoxy color sand self-leveling construction process to ensure flatness, density and luxury appearance: 1. Water-based epoxy primer — Penetrate and strengthen the concrete base, enhance adhesion 2. Epoxy color sand mortar layer — Integral leveling, forming stone texture base 3. Fine putty sealing layer — Repair tiny pores, make floor more delicate 4. High-performance water-based polyurethane topcoat — Anti-yellowing, dust-proof, stain-resistant protection Best Application Scenarios - Modern villa whole-house interior flooring - Villa living room, hallway, dining room, study room - Villa basement, entertainment room, gym room - High-end club, show flat, luxury exhibition space - Cafés, high-end retail and studio decoration FAQ for Villa Epoxy Color Sand Flooring Q1: Is water-based epoxy color sand floor safe for home use? Yes. Water-based formula features low VOC, odorless and eco-friendly. It is specially developed for high-end residential decoration, completely safe for family living. Q2: Will epoxy color sand floor turn yellow? With our professional anti-yellowing water-based polyurethane topcoat, the indoor floor can maintain stable color and will not turn yellow for a long time. Q3: Is seamless epoxy floor hard to maintain? No. The seamless surface is stain-resistant. Daily cleaning only needs mopping with water, much easier than tiles and natural marble. Become Our Global Distributor & Get Factory Price We are a 20-year professional floor coating manufacturer specializing in villa-grade water-based epoxy color sand self-leveling flooring, liquid marble and liquid terrazzo systems. We provide factory direct price, complete technical support, construction guidance and global dealer cooperation policy. Welcome global building material distributors, decoration companies and engineering contractors to cooper
    Read More

  • Water-Based Epoxy Self-Leveling Floor Paint: Also Known As Liquid Marble & Liquid Terrazzo
    Water-Based Epoxy Self-Leveling Floor Paint: Also Known As Liquid Marble & Liquid Terrazzo
    Aug 16, 2026
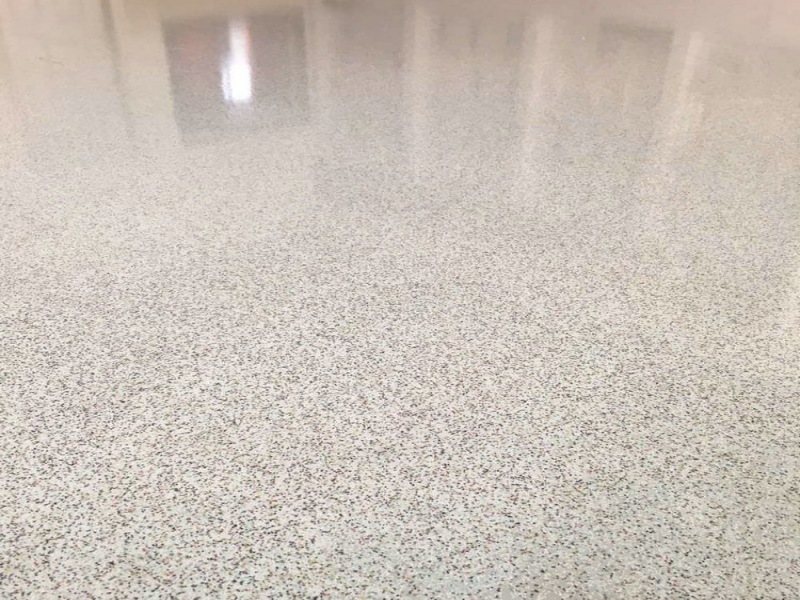
    Water-based epoxy self-leveling coating is a two-component waterborne epoxy floor system mixed with fine colored quartz aggregates. When fully constructed, it forms an integrated seamless surface with natural stone texture. For marketing and decoration purposes, builders, designers and contractors name it: ✅ Liquid Marble ✅ Liquid Terrazzo It is different from ordinary thin-layer epoxy paint. Thanks to outstanding self-leveling property, the material flows evenly on the concrete base without obvious roller marks, achieving flat, smooth, luxury stone visual effects. Core Advantages of Our Water-Based Epoxy Liquid Marble Flooring Eco-friendly Waterborne Formula, Low VOC Uses water as diluent instead of organic solvent. Low odor during construction, meets environmental standards for shopping malls, offices, restaurants and residential projects. Safe for indoor enclosed spaces. Seamless One-Piece Surface, Easy Cleaning No joints, no gaps to trap dust, oil and mold. Stains such as coffee, grease can be wiped off easily. Perfect alternative to ceramic tiles and natural marble. High Hardness & Anti-Scratch Performance Surface pencil hardness reaches 7H. Daily scratches from nails, shoes and small hard objects will not leave permanent marks. Note: 7H means scratch resistance. For long-term friction wear resistance, we adopt optimized aggregate formula to improve Taber abrasion performance. Excellent Adhesion to Multiple Substrates Can be applied on concrete, old cement floors, properly polished tile surfaces. Suitable for new construction and ground renovation projects. Rich Customizable Colors & Texture Various quartz particle sizes and color options available. Matte, satin or semi-gloss finish can be matched according to design requirements. Good Moisture Resistance Water-based system allows moderate substrate moisture, works well in humid regions such as Southeast Asia. Typical Application Scenarios 🏠 Residential: Villa living room, open kitchen, balcony, basement 🏪 Commercial: Cafés, retail shops, exhibition halls, beauty salons, hotel lobbies 🏢 Public space: Offices, gyms, children activity centers 🏭 Light industry: Warehouse, workshop, showroom Standard Construction System (Water-Based Epoxy Liquid Marble) Primer: Water-based epoxy primer, penetrate and strengthen base Mortar middle coat: Epoxy mortar layer for leveling and strength Putty layer: Fine repair, seal tiny pores Topcoat: Water-based acrylic polyurethane protective finish     Q1: Is liquid marble the same as liquid terrazzo? A1: Yes. Both are common commercial names for water-based epoxy self-leveling colored sand flooring. Technical name is water-based epoxy self-leveling floor coating. Q2: Can liquid marble flooring replace natural marble? A2: Visually similar, much lower cost than natural marble. Lighter weight, seamless installation, simpler maintenance. Not identical to natural stone, but ideal for large-area commercial decoration. Q3: Can this coating be laid over existing ceramic tiles? A3: Yes. Tiles must be thoroughly ground to remove glaze layer, cleaned and dedusted before construction to guarantee interlayer adhesion. Q4: Is water-based epoxy liquid marble suitable for outdoor use? A4: The epoxy base layer cannot resist UV radiation. If used on open-air terraces, high-performance UV stable polyurethane topcoat is mandatory. We recommend fully outdoor PU system for long-term outdoor projects. We are professional manufacturer of water-based epoxy self-leveling liquid marble / liquid terrazzo floor paint. We support bulk wholesale, OEM packaging, color customization and provide MSDS, test reports. Contact us to get product datasheets, construction guidelines and competitive factory price.
    Read More
  • Water-Based Epoxy Colored Sand Floor Paint Renovation Guide: 3 Situations with Targeted Treatment for a Cost-Effective and Effective Solution
    Water-Based Epoxy Colored Sand Floor Paint Renovation Guide: 3 Situations with Targeted Treatment for a Cost-Effective and Effective Solution
    Apr 27, 2026
    After 5-8 years, water-based epoxy colored sand floor paint may experience problems such as loss of gloss, localized scratches, and minor delamination. Targeted renovations can restore its beauty without requiring a complete overhaul. Today, we'll share renovation tips for three common situations to help you save over 50% in renovation costs. Situation 1: Gloss loss and shallow scratches only (no delamination or color shift) Cause: Long-term friction wears away the surface finish, causing it to lose its gloss and develop hairline scratches. Renovation Steps: Step 1: Clean the floor thoroughly with a neutral detergent and a soft mop to remove oil and dust. Allow to dry. Step 2: Lightly sand the floor using 1000-grit sandpaper (attached to a belt sander) to evenly polish the floor, removing any aging paint and exposing the fresh sand layer (avoid over-sanding, exposing the base layer). Step 3: Reapply a topcoat. Apply 1-2 coats of the same brand and type of water-based epoxy topcoat (matte/gloss finish, matching the original surface), leaving 12 hours between coats. Once dry, the gloss will be restored and the scratches will disappear. Situation 2: Localized, minor delamination and fading (delamination area <10%) Cause: The base layer is partially damp, the edges were not properly prepared during construction, or the surface was exposed to direct sunlight, causing fading. Renovation Steps: Step 1: Remove the damaged area. Use a utility knife to cut along the delamination edge and remove the delamination sand layer (until the base layer is smooth). Sand the base layer to remove any remaining adhesive. Step 2: Prepare the base. If the base is damp, apply one coat of moisture-proof primer. If the base is dry, apply one coat of epoxy primer and let dry. Step 3: Fill the sand layer. Mix water-based epoxy sand of the same brand and hardener according to the original sand particle size (e.g., 0.5mm). Scrape and apply until flush with the original surface. Use a spatula to smooth the surface when it is partially dry to ensure a consistent texture. Step 4: Apply a topcoat. After the sand layer is completely dry (24 hours), apply one to two coats of the same type of topcoat. If the original floor has a patterned pattern, align the edges of the pattern to avoid color differences. Situation 3: Extensive delamination and cracking (damage area > 30%) Cause: Inadequate base preparation during original construction (e.g., lack of moisture-proofing), poor material quality, or cracking due to building subsidence. Renovation Steps: Step 1: Remove the entire old floor, scraping away all the colored sand layers until the base layer is exposed, and clear away any construction debris. Step 2: Thoroughly repair the base layer. Fill cracks in the cement base with epoxy mortar, remove any hollow areas, and re-cast cement mortar, ensuring a flatness tolerance of ≤3mm. Apply two coats of moisture-proof primer. Step 3: Reapply the colored sand layer, following the standard construction process for new floors (primer → mid-coat → topcoat). If the original look is desired, the original grain size and color of the colored sand must be replicated.
    Read More
  • Water-based Epoxy Colored Sand Floor Paint Seasonal Application Guide: Avoid pitfalls in winter and summer, increase efficiency in spring and autumn
    Water-based Epoxy Colored Sand Floor Paint Seasonal Application Guide: Avoid pitfalls in winter and summer, increase efficiency in spring and autumn
    Apr 25, 2026
    1. Spring Application (March-May): Moderate humidity, focus on preventing "rebound"  Optimal application conditions: Temperature 15-25°C, humidity 40%-60% (measured with a hygrometer), avoid the "return of the south wind" (weather when water droplets form on walls and floors).  Key Points:  Close doors and windows before application, and use a dehumidifier to reduce indoor humidity (apply to humidity ≤ 60%) to prevent moisture from returning to the base layer, which can cause blistering later.  After applying primer and topcoat, maintain ventilation (but avoid strong winds to prevent rapid drying and cracking). Allow each coat to dry for 12-24 hours.  Advantages: Optimal temperature and humidity ensure uniform curing of the material, minimize color variation, and allow for normal use within 7 days of application.  2. Summer Construction (June-August): High temperature and high humidity, especially preventing bubbling and color shift  Optimal construction time: 9-11 AM and 4-6 PM (avoid midday heat), with temperatures ≤30°C and humidity ≤70%.  Key Points:  Mix materials as needed. Use the colored sand and hardener within 1 hour of mixing (high temperatures accelerate curing, and excessive use can cause lumps and render the paint unusable).  Apply thinly in multiple coats (each coat ≤0.5mm thick) to avoid thick coats that slow internal curing and wrinkles. If the temperature exceeds 30°C, dilute the paint with 5%-10% water (as directed in the product instructions) to extend its usable life.  Keep the paint out of direct sunlight (use curtains to block out the heat) to prevent uneven drying times in different areas and color shifts.  3. Autumn Construction (September-November): Suitable Temperatures, Focus on Preventing Over-Drying Optimal construction conditions: Temperatures of 10-20°C and humidity of 30%-50%, making this the most suitable season of the year. Key Points: Maintain a moderate indoor humidity. If the air is too dry (humidity <30%), place a basin of water around the floor to prevent the coating from drying too quickly and causing cracks. Close doors and windows within 24 hours after application to allow the coating to cure slowly. After 24 hours, gradually open windows for ventilation to improve adhesion. Advantages: Uniform curing speed, high surface smoothness, and minimal potential for later problems. 4. Winter Construction (December-February): Low-temperature drying, focus on preventing slow curing and cracking Optimal construction conditions: Temperature ≥10°C (work should be stopped if it falls below 10°C). Air conditioning or heating can be used to increase the temperature (but avoid allowing localized floor temperatures to exceed 20°C to prevent significant temperature fluctuations). Key Points: Preheat the materials indoors for 24 hours before application (to avoid materials that are too cold and slow to cure after mixing). Increase the curing agent in the colored sand/curing agent mix (up to 10% according to the product instructions) to accelerate curing. Extend the drying time to 24-48 hours per coat to avoid delamination caused by applying the next coat before it is completely dry. After application, close doors and windows and use heating to maintain a room temperature of ≥15°C for 7 days to ensure complete curing. Avoid opening windows immediately after application (low outdoor temperatures can cause the floor to cool rapidly, leading to cracking). Open windows gradually for ventilation after 7 days.
    Read More
  • Water-Based Epoxy Sand floor paint for Children's Room Floors: Safe, Fun, and Durable—Three Key Requirements Meet at Once
    Water-Based Epoxy Sand floor paint for Children's Room Floors: Safe, Fun, and Durable—Three Key Requirements Meet at Once
    Apr 20, 2026
    Children's room floors must be safe and non-toxic, withstand children's jumping and graffiti, and create a playful atmosphere. Water-based epoxy sand floor paint, with its environmentally friendly, wear-resistant, and customizable patterns, is an ideal choice for children's room floors. Today, we'll share the key design and installation tips for children's room flooring. 1. Safety First: Three Environmentally Friendly Details You Shouldn't Ignore Choose "Child-Specific": Look for children's-grade water-based epoxy sand with a VOC content of ≤50g/L and a test report indicating "no heavy metals (lead, mercury) detected" to prevent children from chewing on the floor (especially during their crawling years). "Ventilate for 7 days" after application: Although water-based paint has a low odor, children's rooms require extra caution. Keep windows open for ventilation for 7 days after application. Use a formaldehyde detector to test for ≤0.03mg/m³ before allowing children to enter. Avoid sharp corners: Use rounded edges (the same color as the colored sand) instead of right-angled edges at the junction of the floor and wall to prevent bumps and injuries when children run. 2. Childlike Design: Three pattern options are available to suit different age groups. 3-6 Years: Cartoon Mosaic: Use 0.3mm fine sand as the base color (light blue or light pink). Create cartoon animals (such as bears and rabbits) or geometric patterns (circles and stars) in the center of the floor. Use white fine sand to outline the edges of the pattern for a lively and non-glaring effect. 7-12 Years: Play Area Division: Use light gray fine sand for the entire floor. Use a darker shade of the same color in the corners to create "chessboard" and "building block" areas. Use removable mats to accommodate both learning and play. Adolescence: Simple and Individual Lines: Choose pure light gray or off-white fine sand and use metal strips to outline straight and broken lines on the floor. This creates a simple and individual style that adapts to children's evolving tastes. 3. Durable and Practical: Resists Children's "Frequent Destruction" Graffiti Prevention: Apply a "fouling-resistant topcoat": During construction, apply a layer of sewage-resistant topcoat. Children's graffiti with crayons or watercolors can be wiped clean with a damp cloth and a small amount of alcohol, leaving no residue. Bump Prevention: "Partial Thickening" of the Floor: Thicken the floor at the foot of the bed and in the toy area to 2mm to enhance impact resistance and prevent cracking caused by children jumping. If small pits occur, fill them with sand of the same color and epoxy glue. Slip Resistance: Choose an "Anti-Slip Coefficient ≥ 0.6": Children are prone to slipping when running and jumping. Medium sand particle size (0.5mm) with a matte finish meets the anti-slip coefficient standard, preventing slipping even on wet surfaces.
    Read More
  • A must-read for pet-friendly homes! Water-based epoxy colored sand floor paint: A complete guide to anti-scratch, urine-resistant, and easy-to-clean features.
    A must-read for pet-friendly homes! Water-based epoxy colored sand floor paint: A complete guide to anti-scratch, urine-resistant, and easy-to-clean features.
    Apr 16, 2026
    Households with pets often face the challenges of scratching, urine stains, and difficult-to-clean hair. Ordinary wood floors are scratch-resistant, and tile joints harbor hair. However, water-based epoxy colored sand floor paint, with its "hard texture, seamless surface, and acid and alkali resistance," is a perfect fit for pet-friendly homes. Today, we'll share practical tips for installing it in pet-friendly homes. 1. Choose the right parameters to handle pet damage. Choose a medium-sized sand particle size of 0.5-1mm: Fine sand (<0.3mm) is prone to scratching by pet claws, while coarse sand (>1.5mm) can easily trap hair in gaps. Medium-sized sand is both scratch-resistant and easy to clean. Choose a matte, wear-resistant finish: Matte surfaces are more scratch-resistant than glossy ones (preventing slippery scratching caused by reflective surfaces), and have a wear resistance of 2.5 hours or higher. Cats and dogs will not notice any scratching marks. Choose a neutral, stain-resistant color: Light gray and off-white colors tend to show fur, while dark black tends to show dust. Neutral colors like light brown and dark green are recommended. They will make pet hair and footprints less noticeable, reducing cleaning frequency. 2.3 Details to Solve Pet "Special Issues" Prevent Urine Stains: Apply an Acid- and Alkali-Resistant Topcoat: Pet urine is alkaline, and ordinary topcoats are easily corroded and discolored. Apply an additional coat of acid- and alkali-resistant water-based topcoat (suitable for pH 4-10) during application. Urine stains will disappear within 12 hours if wiped clean. Anti-scratch: Furniture feet with "anti-scratch pads." Place non-slip, non-grip mats under sofas and cat climbing frames to reduce scratching. If shallow scratches already occur, lightly sand with 1000-grit sandpaper and then wax to repair them.Easy to clean: Use a "pet-specific vacuum cleaner": Seamless floors don't harbor hair, so vacuum daily with a roller brush in the same direction to easily remove hair. Urine and vomit stains can be wiped away with a damp cloth and a neutral detergent to eliminate residual odor. 3. Tips for Avoiding Pitfalls: Don't Ignore Special Treatment for "Pet Activity Areas" Pet restroom area on the balcony: Create a 0.5% slope on the floor, sloping toward the drain to prevent urine accumulation. Use waterproof adhesive to seal the edges to prevent liquid from seeping into the wall. Pet feeding area: Partially thicken the floor (2mm) to enhance wear resistance and prevent scratches from the food bowl. Create a "circular colored sand mosaic" to clearly define the feeding area and facilitate cleaning.
    Read More
  • Choose Water-Based Epoxy Colored Sand floor paint  for Old House Renovations: 3 Major Advantages + Tips to Avoid Pitfalls, Revitalize Old Floors Without the Hassle
    Choose Water-Based Epoxy Colored Sand floor paint for Old House Renovations: 3 Major Advantages + Tips to Avoid Pitfalls, Revitalize Old Floors Without the Hassle
    Apr 13, 2026
    The biggest headache of renovating an old house is floor treatment—removing old tiles is expensive and inconvenient, while applying conventional floor paint can be environmentally unfriendly. However, water-based epoxy colored sand floor paint, with its advantages of "thin application without raising the surface," "environmental protection, no odor," and compatibility with old subgrades, has become the optimal solution for renovating old house floors. Today, let's discuss how to install it hassle-free for renovating an old house. 1. 3 Core Advantages of Choosing It for Old House Renovations No need to remove old floors, saving time and effort: If the old floor (cement tile or concrete) is smooth and free of hollows, you can directly apply the paint after sanding the surface, eliminating the "removal and removal" process, shortening the construction time by 3-5 days and reducing neighborhood complaints. Thin coatings don't take up too much floor space: With a total thickness of only 1-2mm, they don't constrict the space like wood flooring (which takes up 3-5mm). They're particularly suitable for older homes with ceiling heights under 2.7 meters. Suitable for dampness in older homes: Older homes often experience moisture buildup in corners. The seamless design of water-based epoxy colored sand combined with a moisture-proof primer blocks moisture penetration, preventing mold and bulging. 2. Two Essential Substrate Treatments Before Renovation Check the condition of the old floor: Tile floors should be inspected for hollows (tap and listen; if hollows exceed 10%, remove them). Cement floors should have cracks repaired (fill with epoxy mortar) to ensure a flatness tolerance of ≤3mm. Thoroughly clean and decontaminate: Remove oil and wax deposits from old tiles by soaking them in an alkaline detergent and then scrubbing. Dust from cement floors should be removed repeatedly with a vacuum cleaner and mop to prevent adhesion. 3. Pitfalls to Avoid When Renovating an Old House Don't be tempted to "do it all in one go": If the old floor is too dark (such as dark brown tiles), apply a layer of opaque primer before applying the sandblasting coat. Otherwise, the color will show through, causing color discrepancies. Allow space for furniture to enter and exit: Old houses often have narrow door gaps. Measure the door bottom height before construction. If the sandblasting coat is thicker than the gap, raise the gap in advance to prevent the door from becoming blocked later. Choose a "fast-drying" product: Old house renovations often require ongoing living. Choose a fast-drying water-based epoxy sandblasting product with a surface cure time of 4 hours and a full cure time of 24 hours to minimize disruption to your daily life.
    Read More
  • Water-Based Epoxy Colored Sand Floor Paint: A Guide to 3 Major Application Scenarios
    Water-Based Epoxy Colored Sand Floor Paint: A Guide to 3 Major Application Scenarios
    Apr 09, 2026
    Theory isn't as intuitive as practice. The following three case studies, covering different scenarios, condense the core application logic of water-based epoxy colored sand floor paint to help you quickly gain practical inspiration. Case 1: 140㎡ Modern Minimalist Home (Family with Children) Core Requirements: Environmentally friendly, odorless, slip-resistant, and stain-resistant, while maintaining a minimalist style. Solution: Use 0.3mm light gray fine sand (matte finish) throughout the home. Create a dark gray fine sand circular mosaic with metal strips in the living room sofa area. Switch to 1mm dark gray medium sand (slip-resistant and oil-resistant) in the kitchen. Use 0.3mm light blue fine sand and cartoon colored sand mosaic in the children's room. Highlights: After application, air it out overnight before moving in, allowing children to play barefoot. Juice and oil stains are easily wiped away, and there's no fading or delamination for a year. Feedback: "It's much more practical than old wood floors, durable, and makes the space appear larger." Case 2: 60㎡ Retro-Style Cafe (High Traffic) Core Requirements: Retro atmosphere, durable and easy to clean, and inviting for photos. Solution: 1.5mm caramel-colored coarse sandpaper (lightly sanded for distressing), black medium sandpaper for the bar frame and copper strips, dark green medium sandpaper for striped mosaics near the window, and a colorful sand logo at the entrance. Highlights: The distressed texture complements the retro style and creates a photo-op; coffee spills can be wiped with a damp cloth, and after six months of high traffic, there's no noticeable wear. Feedback: "The floor has a natural 'atmosphere' and is easier to maintain than expected." Case 3: 150㎡ Home Garage (Double Parking) Core Requirements: Anti-slip (in rainy weather), heavy-duty, and clearly demarcated parking spaces. Solution: 2mm dark gray coarse sand (anti-slip coefficient 0.7), yellow medium sand for marking parking spaces and license plate numbers, white lines for lanes, red colored sand for corner warnings, and a blue medium sand border around the charging station area. Highlights: No slipping when parking in the rain, no cracking after two years of vehicle damage; even novice drivers can find a parking space quickly. Feedback: "It's easier to use than the residential concrete floor, dirt-resistant, and safer."
    Read More
  • FAQs about Water-based Epoxy Colored Sand Floor Paint: 4 Major Problems, Targeted Solutions to Avoid Pitfalls
    FAQs about Water-based Epoxy Colored Sand Floor Paint: 4 Major Problems, Targeted Solutions to Avoid Pitfalls
    Mar 09, 2026
    Issue 1: Surface Wrinkles and Bubbles After Application  Cause Analysis: ① The base layer moisture content exceeds the standard (>8%), causing evaporation and bubbles after application; ② The colored sand and curing agent are not mixed evenly, resulting in trapped air; ③ The application temperature is too low (<10°C), resulting in a slow curing process and wrinkling.  Solution:  Small Area (<10cm²): After the floor is fully cured (7 days), use a utility knife to open the bubbles and remove any impurities. Fill the gaps with a water-based epoxy repair agent and the same colored sand. After drying, sand the surface smooth and apply a topcoat.  Large Area: If the area with bubbles or wrinkles exceeds 10% of the total surface area, remove the floor, reapply two coats of moisture-proof primer to the base layer, and then apply the standard process.  Issue 2: Color variation after curing, with areas showing varying shades.  Cause Analysis: ① Mixing different batches of colored sand during construction (natural colored sand has slight color variations between batches); ② Uneven application of topcoat, resulting in darker areas with thicker coating; ③ Significant color variation in the base layer (e.g., areas previously painted), causing color variation due to color bleed-through.  Solution:  Minor color variation (not noticeable to the naked eye): Apply a coat of epoxy wax to the entire surface, using the wax's covering power to minimize the color variation.  Significant color variation: For lighter areas, apply a thin coat of diluted topcoat of the same color (diluted with water in a 1:1 ratio, applied thinly). After drying, compare the colors until they are consistent with the surrounding areas.  Issue 3: Delamination at edges or corners after six months of use.  Cause Analysis: ① Edges, such as corners and doorways, were not reinforced, resulting in delamination from prolonged foot traffic and friction; ② Primer was not applied to the edges during construction, resulting in poor adhesion; ③ Ground subsidence caused cracks in the base layer, leading to delamination. Solution: Local delamination (small area): Scrape off the delamination, sand the base, and apply a coat of primer. Fill the gap with water-based epoxy putty and sand of the same color. After drying, apply a topcoat. Mask the edges with masking tape to ensure a clean line.  Delamination caused by cracked base: First, repair the cracks in the base (using cement mortar). After drying, repair the floor according to the above steps.  Issue 4: Colored sand particles have fallen off, leaving "pits" on the surface.  Cause Analysis: ① The purchased colored sand has poor compatibility with the resin (low-quality colored sand has an uneven surface, making it difficult to bond with the resin); ② The ratio of colored sand to curing agent was incorrect during application (too little curing agent, so the resin was not fully cured); ③ Prolonged friction with sharp objects caused particles to fall off. Solution: Small pits: Use a toothpick to apply a small amount of water-based epoxy glue and fine sand of the same color to fill the pit. After drying, sandpaper to smooth the gap.​ Large areas of loose particles: Partially scrape away and then reapply the middle layer of colored sand. Choose colored sand floor paint  from the same brand and batch as the original product to avoid compatibility issues.
    Read More
  • Water-Based Epoxy Colored Sand Floor Paint: A Space Matching Guide (Living Room/Kitchen/Bedroom)
    Water-Based Epoxy Colored Sand Floor Paint: A Space Matching Guide (Living Room/Kitchen/Bedroom)
    Mar 11, 2026
    The granular texture of water-based epoxy colored sand floor paint makes it suitable for a variety of home styles. However, blindly following trends can often lead to pitfalls—for example, using coarse sand in the bedroom can be uncomfortable, while using light-colored fine sand in the kitchen can easily show dirt. Today, we'll share targeted matching solutions for the three core areas of a home (living room, kitchen, and bedroom).  1. Living Room: Balancing aesthetics and interactivity, choosing the right texture is crucial.  Style Compatibility:  Nordic/Japanese Style: Choose a fine sand particle size of 0.3-0.5mm in off-white, light gray, or natural wood tones. Pair it with a matte finish to create a natural and warm atmosphere. Add a rug to the sofa area to balance the graininess. Industrial/Retro Style: Choose sand with a grit size of 1-2mm, primarily in dark gray, cement gray, or caramel. Preserve the original texture of the colored sand and pair it with a metal coffee table and leather sofa to enhance the vintage feel.  Detail Tips: If the living room and dining room are connected, use "same color, different grit sizes" to separate the areas (fine sand for the living room, coarse sand for the dining room) for a unified and layered look.  2. Kitchen: "Practicality First," Slip and Dirt Resistance Key  Core Requirements: Kitchen floors are frequently exposed to oil and water stains and experience high traffic, so slip resistance and easy cleaning are key.  Matching Options: Grit Size: Prefer a medium grit size of 0.8-1mm (small gaps between particles prevent grease from accumulating, and a slip resistance coefficient of ≥0.5 to prevent slips).  Color: Choose dark colors such as dark gray, light brown, and dark green (for increased stain resistance). Avoid pure white and light yellow (oil stains easily show through, requiring frequent cleaning). Technology: A "localized thickening" (2mm thickness) can be applied under the stove to enhance wear resistance and extend its lifespan.  3. Bedroom: "Comfortable foot feel": Minimizing graininess is key.  Avoidance Tip: Bedroom floors are designed for barefoot walking, and coarse sand particles (≥1mm) can be irritating. We recommend choosing fine sand particles 0.3mm or smaller, paired with a semi-matte finish, for a feel similar to a "matte wood floor."  Style Matching:  Modern Minimalist Style: Choose light apricot or pale blue sand particles, paired with matching wall colors, to create a tranquil atmosphere.  French Retro Style: Choose milk tea or light brown sand particles, and create a "circular colored sand mosaic" (using sand particles of varying shades within the same color) around the bedside area for a more stylish look.  Special Note: A "transition strip" (wood or metal) can be installed at the bedroom door to connect the hallway and bedroom floor to prevent edge wear.
    Read More

leave a message

leave a message
If you are interested in our products and want to know more details,please leave a message here,we will reply you as soon as we can.
submit

home

products

WhatsApp

Contact Us

Start a Conversation

Hi! Click one of our members below to chat on